给特定的 route 传参
Navigator 组件支持通过使用通用标识符从应用程序的任何地方导航到特定路由。在某些情况下,你可能还希望能够传递参数给特定路由。例如,你希望导航到 /user 路由并携带上用户信息。
在 Flutter 中,你能通过提供额外的 arguments 给
Navigator.pushNamed() 方法方便地完成这个任务。通过使用 ModalRoute.of() 方法或
MaterialApp 和 CupertinoApp 构造器中的
onGenerateRoute() 来获取参数。
这个章节讲解的是如何给特定路由传递参数并使用
ModalRoute.of() 和 onGenerateRoute() 来读取参数。
步骤
-
定义需要传递的参数
-
创建组件来获取参数
-
把组件注册到路由表中
-
导航到组件
1. 定义需要传递的参数
首先,定义需要传递给新路由的参数。在这个示例中我们传递了两个数据:页面的标题 title 和内容 message。
To pass both pieces of data, create a class that stores this information. 创建包含 title 和 message 字段的实体类来同时传递这两个数据。
// You can pass any object to the arguments parameter.
// In this example, create a class that contains both
// a customizable title and message.
class ScreenArguments {
  final String title;
  final String message;

  ScreenArguments(this.title, this.message);
}
2. 创建组件来获取参数
接着,创建组件,从 ScreenArguments 提取 title 和 message 参数并展示。为了访问 ScreenArguments,可以使用 ModalRoute.of() 方法。这个方法返回的是当前路由及其携带的参数。
// A Widget that extracts the necessary arguments from
// the ModalRoute.
class ExtractArgumentsScreen extends StatelessWidget {
  const ExtractArgumentsScreen({super.key});

  static const routeName = '/extractArguments';

  @override
  Widget build(BuildContext context) {
    // Extract the arguments from the current ModalRoute
    // settings and cast them as ScreenArguments.
    final args = ModalRoute.of(context)!.settings.arguments as ScreenArguments;

    return Scaffold(
      appBar: AppBar(
        title: Text(args.title),
      ),
      body: Center(
        child: Text(args.message),
      ),
    );
  }
}
3. 把组件注册到路由表中
然后,在 MaterialApp 的路由表 routes 中增加一个入口,路由表 routes 会根据路由的名称来决定需要创建哪个路由。
MaterialApp(
  routes: {
    ExtractArgumentsScreen.routeName: (context) =>
        const ExtractArgumentsScreen(),
  },
)
4. 导航到组件
最后,在用户点击按钮后导航到 ExtractArgumentsScreen。在 Navigator.pushNamed() 方法的 arguments 属性里提供需要传递的参数。随后,ExtractArgumentsScreen 就可以从参数中提取 title 和 message。
// A button that navigates to a named route.
// The named route extracts the arguments
// by itself.
ElevatedButton(
  onPressed: () {
    // When the user taps the button,
    // navigate to a named route and
    // provide the arguments as an optional
    // parameter.
    Navigator.pushNamed(
      context,
      ExtractArgumentsScreen.routeName,
      arguments: ScreenArguments(
        'Extract Arguments Screen',
        'This message is extracted in the build method.',
      ),
    );
  },
  child: const Text('Navigate to screen that extracts arguments'),
),
此外,还可以使用 onGenerateRoute 提取参数
除了直接从组件里提取参数,你也可以通过 onGenerateRoute() 函数提取参数,然后把参数传递给组件。
onGenerateRoute() 函数会基于给定的 RouteSettings 来创建正确的路由。
MaterialApp(
  // Provide a function to handle named routes.
  // Use this function to identify the named
  // route being pushed, and create the correct
  // Screen.
  onGenerateRoute: (settings) {
    // If you push the PassArguments route
    if (settings.name == PassArgumentsScreen.routeName) {
      // Cast the arguments to the correct
      // type: ScreenArguments.
      final args = settings.arguments as ScreenArguments;

      // Then, extract the required data from
      // the arguments and pass the data to the
      // correct screen.
      return MaterialPageRoute(
        builder: (context) {
          return PassArgumentsScreen(
            title: args.title,
            message: args.message,
          );
        },
      );
    }
    // The code only supports
    // PassArgumentsScreen.routeName right now.
    // Other values need to be implemented if we
    // add them. The assertion here will help remind
    // us of that higher up in the call stack, since
    // this assertion would otherwise fire somewhere
    // in the framework.
    assert(false, 'Need to implement ${settings.name}');
    return null;
  },
)
交互式样例
import 'package:flutter/material.dart';
void main() => runApp(const MyApp());
class MyApp extends StatelessWidget {
const MyApp({super.key});
@override
Widget build(BuildContext context) {
return MaterialApp(
routes: {
ExtractArgumentsScreen.routeName: (context) =>
const ExtractArgumentsScreen(),
},
// Provide a function to handle named routes.
// Use this function to identify the named
// route being pushed, and create the correct
// Screen.
onGenerateRoute: (settings) {
// If you push the PassArguments route
if (settings.name == PassArgumentsScreen.routeName) {
// Cast the arguments to the correct
// type: ScreenArguments.
final args = settings.arguments as ScreenArguments;
// Then, extract the required data from
// the arguments and pass the data to the
// correct screen.
return MaterialPageRoute(
builder: (context) {
return PassArgumentsScreen(
title: args.title,
message: args.message,
);
},
);
}
// The code only supports
// PassArgumentsScreen.routeName right now.
// Other values need to be implemented if we
// add them. The assertion here will help remind
// us of that higher up in the call stack, since
// this assertion would otherwise fire somewhere
// in the framework.
assert(false, 'Need to implement ${settings.name}');
return null;
},
title: 'Navigation with Arguments',
home: const HomeScreen(),
);
}
}
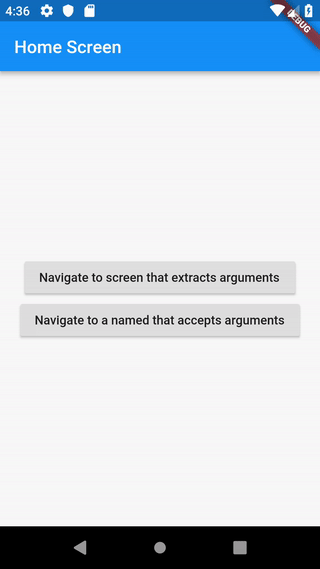
class HomeScreen extends StatelessWidget {
const HomeScreen({super.key});
@override
Widget build(BuildContext context) {
return Scaffold(
appBar: AppBar(
title: const Text('Home Screen'),
),
body: Center(
child: Column(
mainAxisAlignment: MainAxisAlignment.center,
children: [
// A button that navigates to a named route.
// The named route extracts the arguments
// by itself.
ElevatedButton(
onPressed: () {
// When the user taps the button,
// navigate to a named route and
// provide the arguments as an optional
// parameter.
Navigator.pushNamed(
context,
ExtractArgumentsScreen.routeName,
arguments: ScreenArguments(
'Extract Arguments Screen',
'This message is extracted in the build method.',
),
);
},
child: const Text('Navigate to screen that extracts arguments'),
),
// A button that navigates to a named route.
// For this route, extract the arguments in
// the onGenerateRoute function and pass them
// to the screen.
ElevatedButton(
onPressed: () {
// When the user taps the button, navigate
// to a named route and provide the arguments
// as an optional parameter.
Navigator.pushNamed(
context,
PassArgumentsScreen.routeName,
arguments: ScreenArguments(
'Accept Arguments Screen',
'This message is extracted in the onGenerateRoute '
'function.',
),
);
},
child: const Text('Navigate to a named that accepts arguments'),
),
],
),
),
);
}
}
// A Widget that extracts the necessary arguments from
// the ModalRoute.
class ExtractArgumentsScreen extends StatelessWidget {
const ExtractArgumentsScreen({super.key});
static const routeName = '/extractArguments';
@override
Widget build(BuildContext context) {
// Extract the arguments from the current ModalRoute
// settings and cast them as ScreenArguments.
final args = ModalRoute.of(context)!.settings.arguments as ScreenArguments;
return Scaffold(
appBar: AppBar(
title: Text(args.title),
),
body: Center(
child: Text(args.message),
),
);
}
}
// A Widget that accepts the necessary arguments via the
// constructor.
class PassArgumentsScreen extends StatelessWidget {
static const routeName = '/passArguments';
final String title;
final String message;
// This Widget accepts the arguments as constructor
// parameters. It does not extract the arguments from
// the ModalRoute.
//
// The arguments are extracted by the onGenerateRoute
// function provided to the MaterialApp widget.
const PassArgumentsScreen({
super.key,
required this.title,
required this.message,
});
@override
Widget build(BuildContext context) {
return Scaffold(
appBar: AppBar(
title: Text(title),
),
body: Center(
child: Text(message),
),
);
}
}
// You can pass any object to the arguments parameter.
// In this example, create a class that contains both
// a customizable title and message.
class ScreenArguments {
final String title;
final String message;
ScreenArguments(this.title, this.message);
}