配置 flavors 构建双端
What are flavors
Have you ever wondered how to set up different environments in your Flutter app? Flavors (known as build configurations in iOS and macOS), allow you (the developer) to create separate environments for your app using the same code base. For example, you might have one flavor for your full-fledged production app, another as a limited “free” app, another for testing experimental features, and so on.
Say you want to make both free and paid versions of your Flutter app. You can use flavors to set up both app versions without writing two separate apps. For example, the free version of the app has basic functionality and ads. In contrast, the paid version has basic app functionality, extra features, different styles for paid users, and no ads.
You also might use flavors for feature development. If you’ve built a new feature and want to try it out, you could set up a flavor to test it out. Your production code remains unaffected until you’re ready to deploy your new feature.
Flavors let you define compile-time configurations and set parameters that are read at runtime to customize your app’s behavior.
This document guides you through setting up Flutter flavors for iOS, macOS, and Android.
Environment set up
Prerequisites:
- Xcode installed
- An existing Flutter project
To set up flavors in iOS and macOS, you’ll define build configurations in Xcode.
Creating flavors in iOS and macOS
-
Open your project in Xcode.
-
Select Product > Scheme > New Scheme from the menu to add a new
Scheme.- A scheme describes how Xcode runs different actions.
For the purposes of this guide, the example flavor and scheme are
named
free. The build configurations in thefreescheme have the-freesuffix.
- A scheme describes how Xcode runs different actions.
For the purposes of this guide, the example flavor and scheme are
named
-
Duplicate the build configurations to differentiate between the default configurations that are already available and the new configurations for the
freescheme.- Under the Info tab at the end of the Configurations dropdown list, click the plus button and duplicate each configuration name (Debug, Release, and Profile). Duplicate the existing configurations, once for each environment.
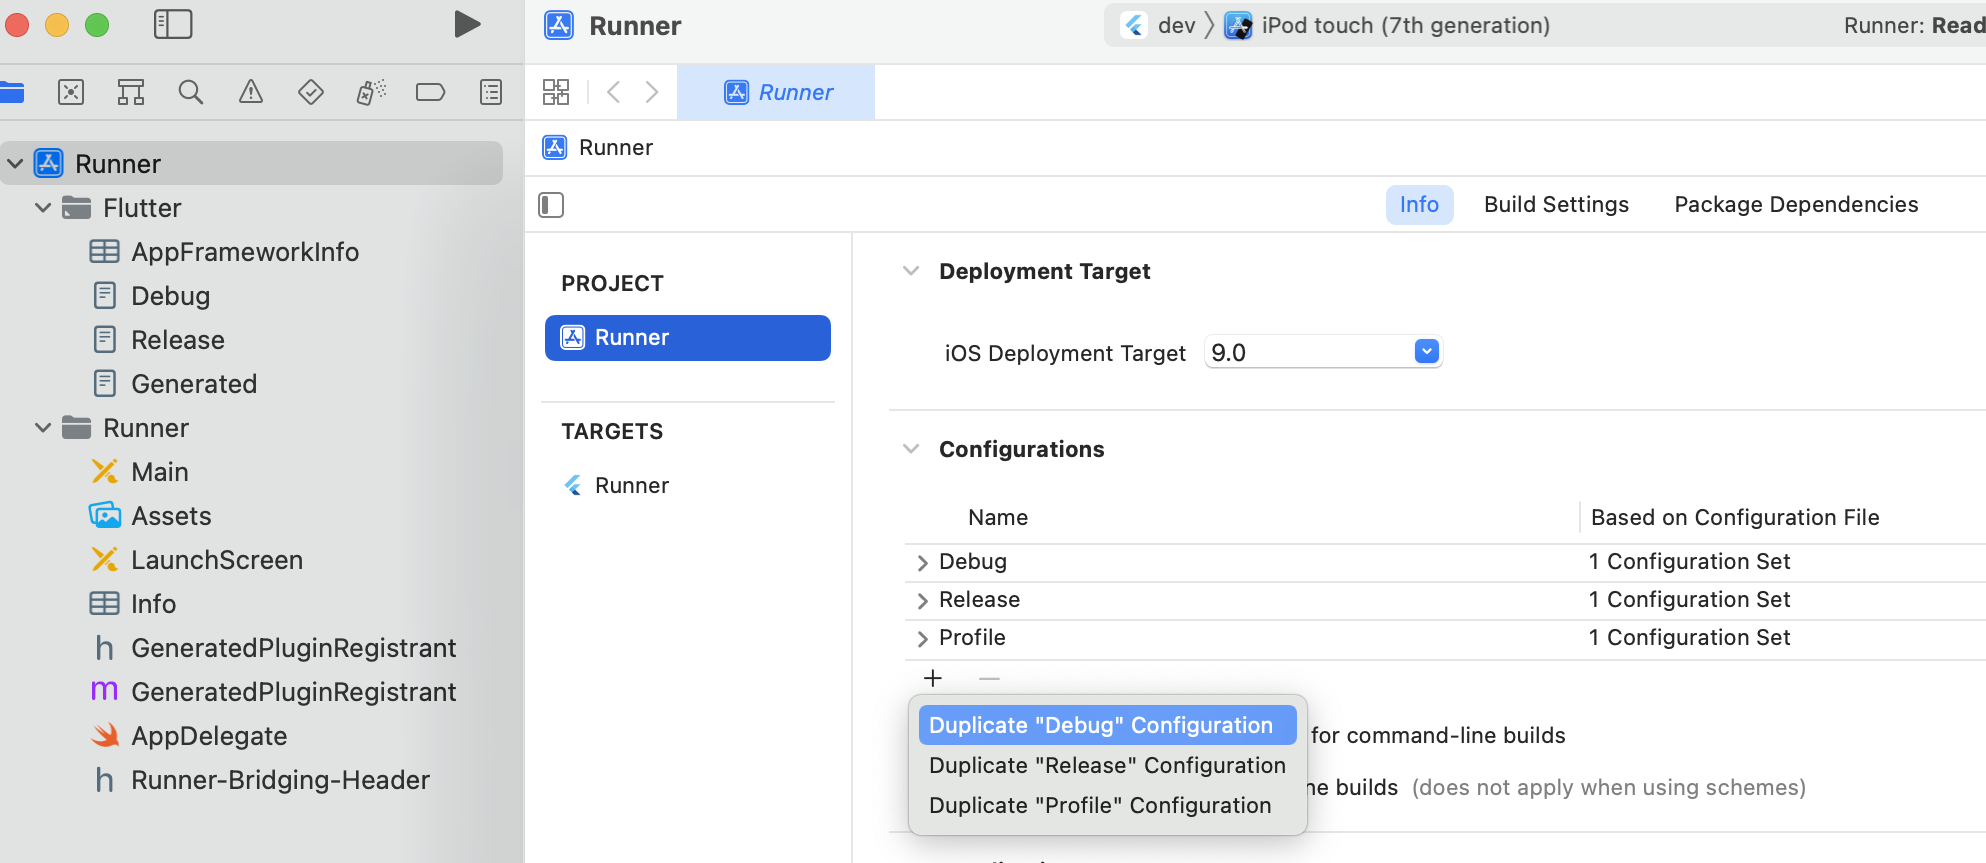
-
To match the free flavor, add
-freeat the end of each new configuration name. -
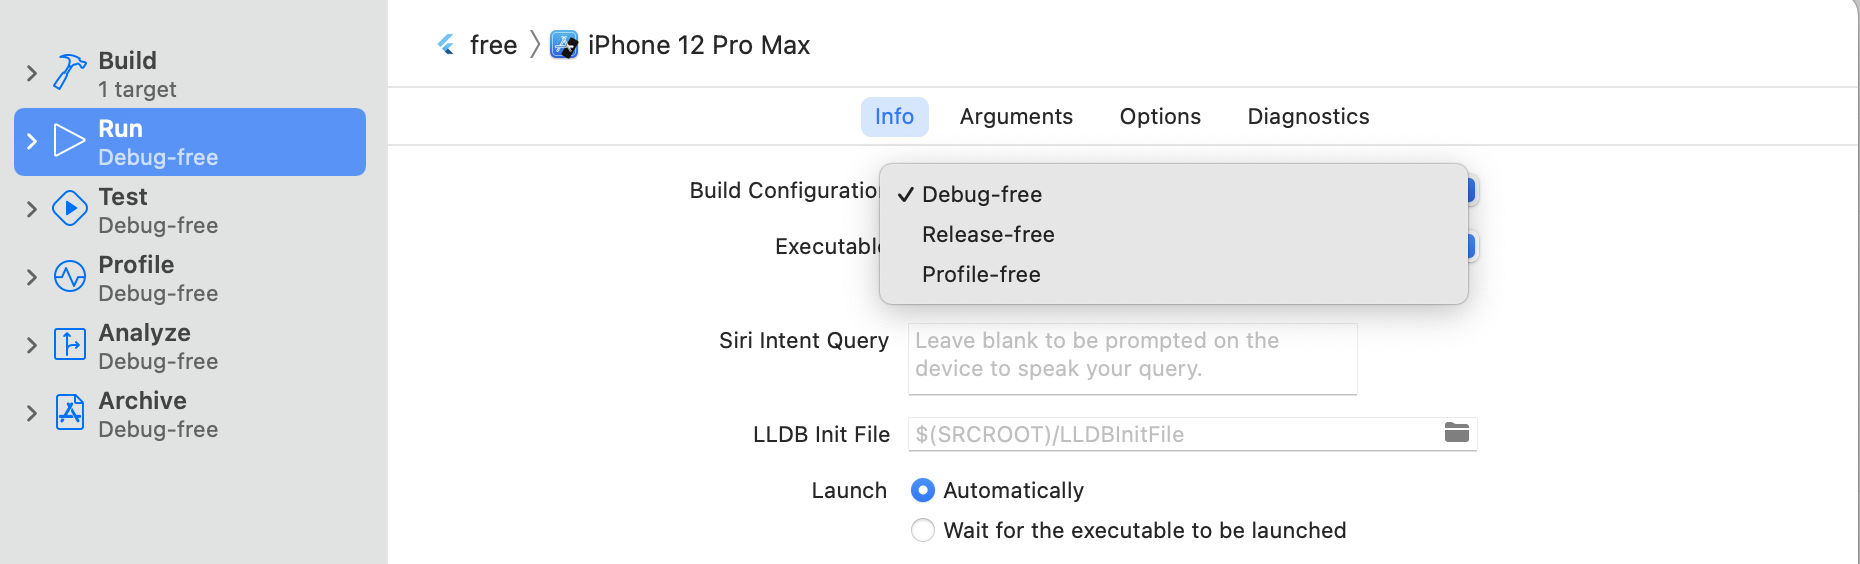
Change the
freescheme to match the build configurations already created.- In the Runner project, click Manage Schemes… and a pop up window opens.
- Double click the free scheme. In the next step (as shown in the screenshot), you’ll modify each scheme to match its free build configuration:
Using flavors in iOS and macOS
Now that you’ve set up your free flavor,
you can, for example, add different product bundle identifiers per flavor.
A bundle identifier uniquely identifies your application.
In this example, we set the Debug-free value to equal
com.flavor-test.free.
-
Change the app bundle identifier to differentiate between schemes. In Product Bundle Identifier, append
.freeto each -free scheme value.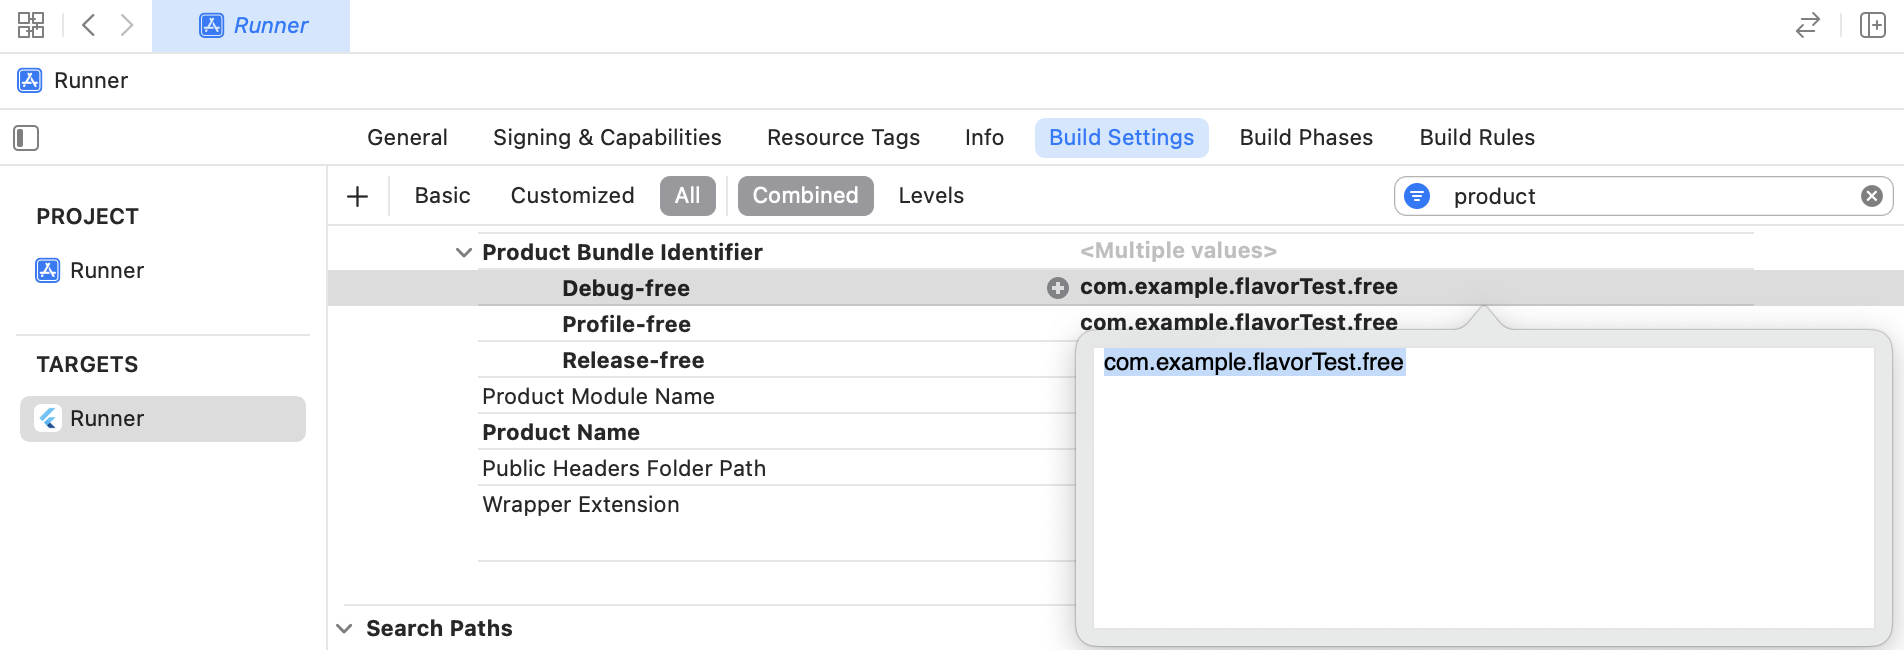
-
In the Build Settings, set the Product Name value to match each flavor. For example, add Debug Free.
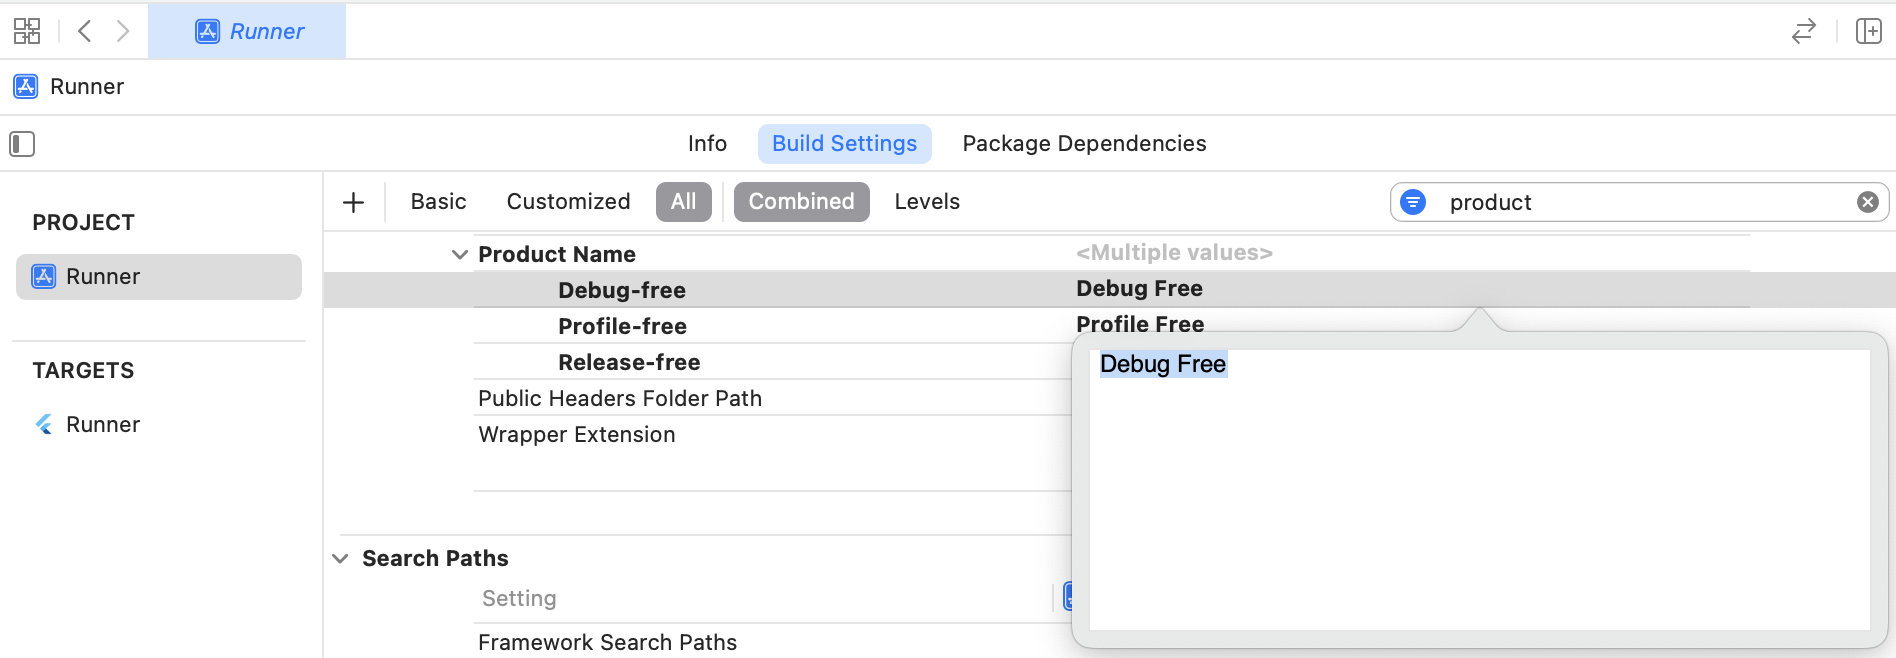
-
Add the display name to Info.plist. Update the Bundle Display Name value to
$(PRODUCT_NAME).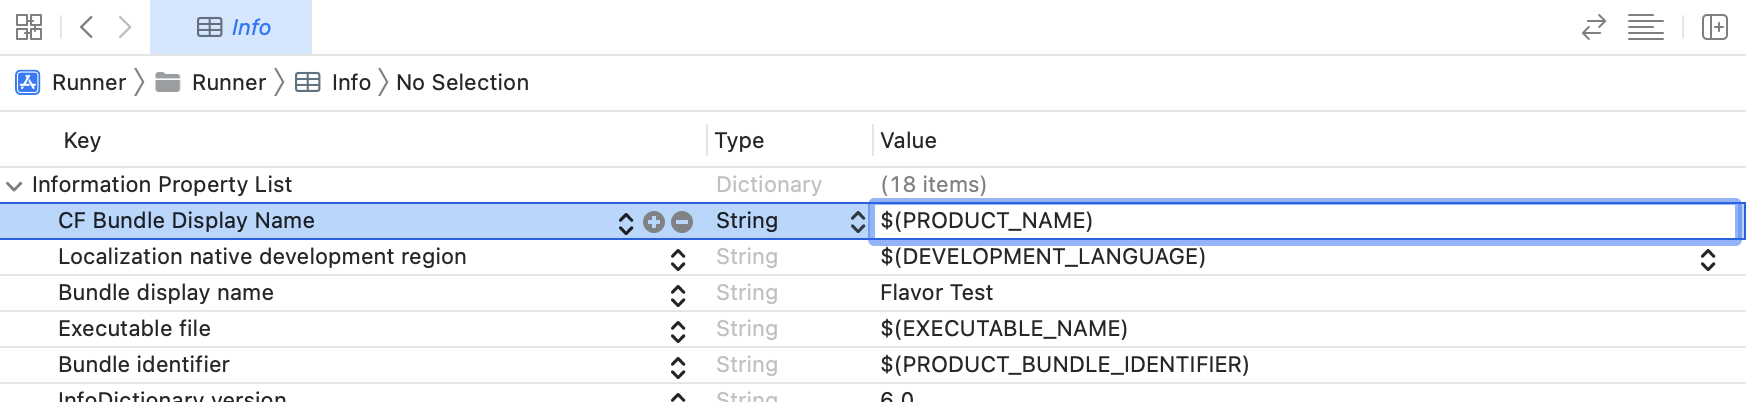
Now you have set up your flavor by making a free scheme
in Xcode and setting the build configurations for that scheme.
For more information, skip to the Launching your app flavors section at the end of this document.
Plugin configurations
If your app uses a Flutter plugin, you need to update
ios/Podfile (if developing for iOS) and macos/Podfile (if developing for macOS).
- In
ios/Podfileandmacos/Podfile, change the default for Debug, Profile, and Release to match the Xcode build configurations for thefreescheme.
project 'Runner', {
  'Debug-free' => :debug,
  'Profile-free' => :release,
  'Release-free' => :release,
}
Using flavors in Android
Setting up flavors in Android can be done in your project’s build.gradle file.
-
Inside your Flutter project, navigate to android/app/build.gradle.
-
Create a
flavorDimensionto group your added product flavors. Gradle doesn’t combine product flavors that share the samedimension. -
Add a
productFlavorsobject with the desired flavors along with values for dimension, resValue, and applicationId or applicationIdSuffix.- The name of the application for each build is located in resValue.
- If you specify a applicationIdSuffix instead of a applicationId, it is appended to the “base” application id.
flavorDimensions "default"

productFlavors {
    free {
        dimension "default"
        resValue "string", "app_name", "free flavor example"
        applicationIdSuffix ".free"
    }
}
Setting up launch configurations
Next, add a launch.json file; this allows you to run the command
flutter run --flavor [environment name].
In VSCode, set up the launch configurations as follows:
- In the root directory of your project, add a folder called .vscode.
- Inside the .vscode folder, create a file named launch.json.
- In the launch.json file, add a configuration object for each flavor. Each configuration has a name, request, type, program, and args key.
{
  "version": "0.2.0",
  "configurations": [
    {
      "name": "free",
      "request": "launch",
      "type": "dart",
      "program": "lib/main_development.dart",
      "args": ["--flavor", "free", "--target", "lib/main_free.dart" ]
    }
  ],
  "compounds": []
}
You can now run the terminal command
flutter run --flavor free or you can set up a run
configuration in your IDE.
Launching your app flavors
- Once the flavors are set up, modify the Dart code in lib / main.dart to consume the flavors.
- Test the setup using
flutter run --flavor freeat the command line, or in your IDE.
For examples of build flavors for iOS, macOS, and Android, check out the integration test samples in the Flutter repo.
Retrieving your app’s flavor at runtime
From your Dart code, you can use the appFlavor API to determine what
flavor your app was built with.
Conditionally bundling assets based on flavor
If you aren’t familiar with how to add assets to your app, see Adding assets and images.
If you have assets that are only used in a specific flavor in your app, you can configure them to only be bundled into your app when building for that flavor. This prevents your app bundle size from being bloated by unused assets.
Here is an example:
flutter:
  assets:
    - assets/common/
    - path: assets/free/
      flavors:
        - free
    - path: assets/premium/
      flavors:
        - premium
In this example, files within the assets/common/ directory will always be bundled
when app is built during flutter run or flutter build. Files within the
assets/free/ directory are bundled only when the --flavor option is set
to free. Similarly, files within the assets/premium directory are
bundled only if --flavor is set to premium.
More information
For more information on creating and using flavors, check out the following resources:
- Build flavors in Flutter (Android and iOS) with different Firebase projects per flavor Flutter Ready to Go
- Flavoring Flutter Applications (Android & iOS)
- Flutter Flavors Setup with multiple Firebase Environments using FlutterFire and Very Good CLI
Packages
For packages that support creating flavors, check out the following: